- Authors


- Published on
Wayland on NixOS, or: Confusion, Conquest, Triumph
This post is part of a series about NixOS. The series is done in support of my upcoming Opus Magnum, "Practical NixOS: the Book", and you can read the detailed post here.
Should you find this article lacking some information, be sure to tell me in the comments or elsewhere, since it is a living document and I am very keen on expanding it.
This article's full code alongside the rest of configuration is available on GitHub.
Table of Contents (Click to Hide/Show)
- What are Xorg, Wayland, and Why You Should Choose the Latter
- Display Server
- Display Manager
- Window Manager
- Window Server
- Compositor
- Desktop Environment
- Integrating Wayland with NixOS
- Setting the Right Screen Resolution
- Home Manager to the Rescue
- Adding a Nice Login Screen
- Getting More Stuff for Sway
- Finishing Touches
- And We're Done!
What are Xorg, Wayland, and Why You Should Choose the Latter
Xorg and Wayland are two popular display server protocols used in Linux-based operating systems to manage graphical displays. Xorg, also known as the X Window System, X11, or simply X, has been the de facto protocol, and as the technology landscape has evolved, Xorg's age and complexity have become increasingly apparent, paving the way for the development of Wayland.
Wayland is a modern display server protocol, which was created to address the shortcomings and inefficiencies of Xorg. Unlike its predecessor, Wayland is designed with simplicity and performance in mind, offering a more streamlined and secure approach to managing graphical displays. Wayland's architecture eliminates many of the legacy elements found in Xorg, resulting in a leaner, more efficient system that is easier to maintain and develop. Moreover, Wayland's direct rendering model reduces the need for context switching between client applications and the display server, which in turn improves performance and reduces input lag.
Given the numerous advantages of Wayland over Xorg, users are increasingly encouraged to make the switch. Wayland's modern architecture provides enhanced security, for example, preventing unauthorized applications from snooping on user input or capturing screen content. In addition, Wayland's improved performance and reduced input lag create a more responsive and enjoyable user experience, which is definitely noticeable once you make the switch, even more so when you're using QEMU KVM. As the Linux ecosystem continues to evolve, Wayland represents the future of display server protocols, making it the clear choice for users seeking a robust, efficient, and secure solution for managing their graphical displays.
A lot of confusion around Wayland stems from extremely poor naming choices. I also believe, as the time goes, the meaning of these terms goes adrift, and people using these terms may not be aware of the precise meaning themselves.
Here is a list of the most common terms which you may have heard in the context of Wayland or Xorg. The information provided is inteded to disambiguate their meaning and give the better opportunity for a reader to get hold of the entire picture. It contains a lot of links which you are free to not click on, they serve as just a simple reference.
Display Server
The Display Server is somewhat equivalent to the Xorg itself, with the Xorg part ommited. You may confirm it via the Xorg article on Arch Linux Wiki.
Wikipedia describes the Display Server as a coordinator of "input and output", which does not really help.
There is also a Wikipedia List of display servers article, but take that naming with a grain of salt.
Display Manager
I would say, this is the worst name possible one could have chosen for an OS concept. If you google for "display manager", it would also show the results with "login manager" in bold, which means that for Google both are the same search term. What is understood under "Display manager" is a login screen, which you are presented with after your system's initial boot process, plus some machinery to trigger the further actions upon a successful login.
That is, literally, a prompt to enter the username and the password found in some pretty floating window alongside with, maybe, a clock, some accessibility features, option to select a keyboard layout, and a power-off button. The prompt may also come as some fancy terminal interface, and we'll use exactly such one for our system further below.
You may also want to check this classic article "I Shall Call It.. SomethingManager".
Window Manager
Again, we get some other "Manager" straight out of Harward Business School. As per Arch Wiki, a Window Manager, often spelled as WM, is a system software that controls the placement and appearance of windows within a windowing system in a graphical user interface (GUI), which can be part of a desktop environment (DE) or be used standalone. What Window Manager does is drawing stuff like borders and bars of windows, and putting them onto the desktop in a floating or stacking or whatever manner. You should also be used to this term in case you're already sporting something like i3 or Xmonad. The Wikipedia Window Manager article may come in handy.
The second sentence at the Arch Wiki reads as following:
the "Window Manager" concept is unique to Xorg. The equivalent of window managers on Wayland are called compositors because they also act as compositing window managers
With that in mind, we can say that the concept of "Window Manager" in the Wayland world would be the "Compositor", of which we would learn below, and by itself "Window Manager" is not really applicable to Wayland.
Window Server
This Window Server is an extremly ambigous term, which you can check via few google searches that hardly yield any reasonable results. I may be lacking expertise here, and please correct me if I'm wrong, but I could say this is something coming from the Java world as some exception was named so. Wikipedia's X Window System protocols and architecture has a single mention of Window Server without a definition, and there are no sensbile mentions on the Arch Wiki.
Compositor
This is the word you'd be hearing most often when talking of Wayland.
Arch Wiki actually disambiguates between a "Composite" for Xorg and a "Compositor" for Wayland. Wayland Compositors Arch Wiki Article contains a pretty extensive list of those. From that we can tell that a "Compositor" is an application, or a suite of applications that implements your system's GUI, so in a sense, it is synonymous with both "Desktop Environment", and "Window Manager".
Wikipedia Article is full of uncategorized information presented in way when no sentence makes any sense without additional context, and I am pretty sure it is mixing concepts, adds irrelevant information and is not factually correct.
Desktop Environment
A Desktop Environment is a concept of a nice abstraction, a metaphor of your literal "top of a physical desk", which also gives you the feel, the look and the experience of such. What is usually implied under "Desktop Environment" are the libraries which render your GUI, the configurations for numerous appearance tweaks, and the collection of all the applications and utilities that bring such experience, with emphasis on how all they work together in accord. It might also be nessesary to disambiguate Desktop Environment from a Window Manager - the latter does not give you the feel, but just the bare minimum (up to a degree) to draw the windows and position them on the screen.
Example and most well-known desktop environments are
- GNOME
- KDE
- Xfce
and all of these are supported by both Xorg and Wayland.
So, the resulting mapping from Xorg to Wayland concepts would be the following:
| Xorg | Wayland | Human |
|---|---|---|
| Display Server | Compositor (1) | An application that facilitates GUI input and output |
| Display Manager | Display Manager | A login screen |
| Window Manager | Compositor (2) | Application that draws windows and places those on the screen |
| Desktop Environment | Desktop Environment | The look and the feel of the physical desk, inside your PC |
| Window Server | Irrelevant | Don't even pay attention to it |
Integrating Wayland with NixOS
Transgressing all the drama rules and not brining in any tension for a build-up, I tell you: installing Wayland in NixOS, unlike in other systems, is very simple and straight-forward.
Let's start with disabling all the X stuff to get some pure command line experience, and we also have had that right after the fresh NixOS install. Just comment out everything under services.xserver (the "graphics" section) inside /etc/nixos/configuration.nix:
  # graphics
  # services.xserver = {
  #   enable = true;
  #   resolutions = [{ x = 1920; y = 1080; }];
  #   virtualScreen = { x = 1920; y = 1080; };
  #   layout = "us"; # keyboard layout
  #   desktopManager = {
  #     xterm.enable = false;
  #     xfce.enable = true;
  #   };
  #   displayManager.defaultSession = "xfce";
  #   autorun = true; # run on graphic interface startup
  #   libinput.enable = true; # touchpad support
  # };
Then nixos-rebuild switch --flake .#yourHostNameGoesHere under superuser (use sudo su) from within /etc/nixos dir, and voila - you got no GUI!
Now, let's enable sway via the options provided by NixOS inside your /etc/nixos/configuration.nix.
  # locales
  # https://en.wikipedia.org/wiki/List_of_tz_database_time_zones
  time.timeZone = "America/New_York";
  i18n.defaultLocale = "en_US.UTF-8";

  # add the following line somewhere in `configuration.nix`
  # for example, in between locales and audio sections
  programs.sway.enable = true;

  # audio
  sound.enable = true;
  nixpkgs.config.pulseaudio = true;
  hardware.pulseaudio.enable = true;
Rebuild with nixos-rebuild switch --flake .#yourHostNameGoesHere, remember about superuser and current working dir. Take note that our system is flake-enabled one, thus you may want to check the article on how to enable flakes on NixOS, if you hadn't yet. Then, reboot with reboot (who could have guessed!), and voila X2 - you are still facing a command line interface?..
Login with your user. Then, to start Sway, run exec sway:

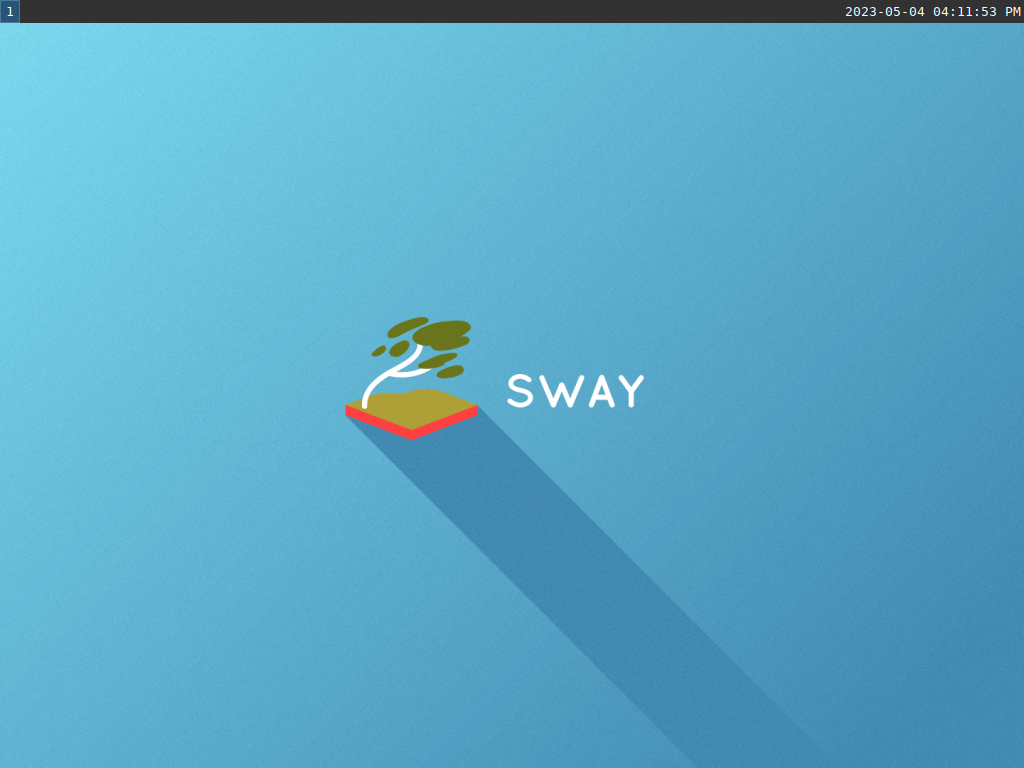
It should be already picking up the default keybinds, e.g. Mod4+2 to switch to the second workspace or Mod4 + Enter to open a terminal. You may be already familiar with those if you have used i3 before, and if not: Mod4 stands for the "Super key", and on the most of the keyboards out there, it is usually the key with the Microsoft Windows logo on top of it.
Setting the Right Screen Resolution
If you're using a QEMU KVM Guest system for your NixOS, you may find yourself with the smallest available resolution currently active, and so you would want to set a appropriate one. To match your actual screen size of the host system, first you need to know it. Say, your host system (main system) is Ubuntu - then to get the current display size, you would run xrandr | grep "\*". The xrandr command gives you the list of available screen resolutions and refresh rates, plus a hint via "*" on the one you're using right now.
xrandr:
Screen 0: minimum 320 x 200, current 1920 x 1080, maximum 16384 x 16384
eDP connected primary 1920x1080+0+0 (normal left inverted right x axis y axis) 309mm x 174mm
   1920x1080     60.03*+
   1680x1050     60.03
   1280x1024     60.03
   1440x900      60.03
   1280x800      60.03
   1280x720      60.03
   1024x768      60.03
   800x600       60.03
   640x480       60.03
HDMI-A-0 disconnected (normal left inverted right x axis y axis)
DisplayPort-0 disconnected (normal left inverted right x axis y axis)
DisplayPort-1 disconnected (normal left inverted right x axis y axis)
On my system the active configuration is actually the top-most, so grep is not that useful, but for the sake of it let's demonstrate the command usage:
xrandr | grep "\*":
1920x1080 60.03*+
grep "\*" filters the lines that are being output by xrandr and only prints the one(s) with asterisk in it, where the asterisk is used to denote the currently used configuration. The double quotes and backslash are there, because an asterisk is a special character with a distinct function in the Linux shell, so to literal-match the asterisk char, you would have to properly escape it (hence, the double quotes and the backslash).
Next, you would need to check which outputs (devices) your system is aware of and what are the available screen size options for sway. To do that, run swaymsg -t get_outputs. Again, if you're on QEMU, you would most likely get something like this:
Output Virtual-1 'Unknown Unknown Unknown' (focused)
  Current mode: 1920x1080 @ 60.000 Hz
  Position: 0,0
  Scale factor: 1.000000
  Scale filter: nearest
  Subpixel hinting: unknown
  Transform: normal
  Workspace: 1
  Max render time: off
  Adaptive sync: disabled
  Available modes:
    1024x768 @ 60.004 Hz
    2560x1600 @ 59.987 Hz
    2560x1600 @ 59.972 Hz
    1920x1440 @ 60.000 Hz
    1856x1392 @ 59.995 Hz
    1792x1344 @ 60.000 Hz
    2048x1152 @ 60.000 Hz
    1920x1200 @ 59.885 Hz
    1920x1200 @ 59.950 Hz
    1920x1080 @ 60.000 Hz
    1600x1200 @ 60.000 Hz
    1680x1050 @ 59.954 Hz
    1680x1050 @ 59.883 Hz
    1400x1050 @ 59.978 Hz
    1400x1050 @ 59.948 Hz
    1600x900 @ 60.000 Hz
    1280x1024 @ 60.020 Hz
    1440x900 @ 59.887 Hz
    1440x900 @ 59.901 Hz
    1280x960 @ 60.000 Hz
    1280x854 @ 59.951 Hz
    1366x768 @ 59.790 Hz
    1366x768 @ 60.000 Hz
    1360x768 @ 60.015 Hz
    1280x800 @ 59.810 Hz
    1280x800 @ 59.910 Hz
    1280x768 @ 59.870 Hz
    1280x768 @ 59.995 Hz
    1280x720 @ 60.000 Hz
    1152x768 @ 59.950 Hz
    800x600 @ 60.317 Hz
    800x600 @ 56.250 Hz
    848x480 @ 60.000 Hz
    720x480 @ 59.938 Hz
    640x480 @ 59.940 Hz
I'll use 1920x1080 @ 60.000 Hz "mode", since it matches my host system resolution. Now, how do we specify that mode?
Home Manager to the Rescue
Vanilla NixOS options actually do not provide a nice way to set up the resolution, and do not provide a nice solution for everything to "just work". Luckily, we got all covered wit the help of Home Manager's options.
To enable Home Manager on your NixOS installation, check out the previous article, which explains how to do it.
"Using Home Manager" at NixOS Wiki Article on Sway tells us to enable polkit. Polkit, or PolicyKit, is a component of the Linux operating system that provides an organized framework for managing system-wide privileges. It offers a way for non-privileged processes to communicate with privileged ones, granting granular permissions to perform administrative tasks without needing to grant full root access. Polkit is necessary for Wayland, because Wayland has a strict security policy that does not allow clients to open windows with root permissions. However, the Polkit authentication agent is not used to open windows as root, but rather to authenticate discrete actions that require root privileges.
Let's edit our /etc/nixos/configuration.nix and add polkit:
  # locales
  # https://en.wikipedia.org/wiki/List_of_tz_database_time_zones
  time.timeZone = "America/New_York";
  i18n.defaultLocale = "en_US.UTF-8";

  # wayland-related
  # programs.sway.enable = true; # commented out due to usage of home-manager's sway
  security.polkit.enable = true;
  hardware.opengl.enable = true; # when using QEMU KVM

  # audio
  sound.enable = true;
  nixpkgs.config.pulseaudio = true;
  hardware.pulseaudio.enable = true;
As you may see, we have also commented out the previously added programs.sway.enable = true; - we won't be using that one and instead we'll opt in for the sway that is provided by the Home Manager. We have also added hardware.opengl.enable = true;, otherwise we would have some issues with some of the GUI applications.
Now, let's add the tweak the sway configuration provided by Home Manager. Edit the /etc/nixos/flake.nix:
  programs.home-manager.enable = true;

  wayland.windowManager.sway = {
    enable = true;
    config = rec {
      modifier = "Mod4"; # Super key
      output = {
        "Virtual-1" = {
          mode = "1920x1080@60Hz";
        };
      };
    };
  };
  home.stateVersion = "23.11";
I have explicitly added modifier = "Mod4";, because it is the default one for the sway from NixOS options, but is not the default one for the sway from Home Manager's options.
Again, rebuild-switch under superuser from the /etc/nixos directory - nixos-rebuild switch --flake .#yourHostNameGoesHere, then reboot.
You would now be welcomed by the same old command line interface. Log in with your normal user, type in sway (but not exec sway like before), and you now have Sway that is set to the correct resolution, all from within the Home Manager configuration!
Still, it does not autostart on login, and there's actually no login screen at all. Let's fix that.
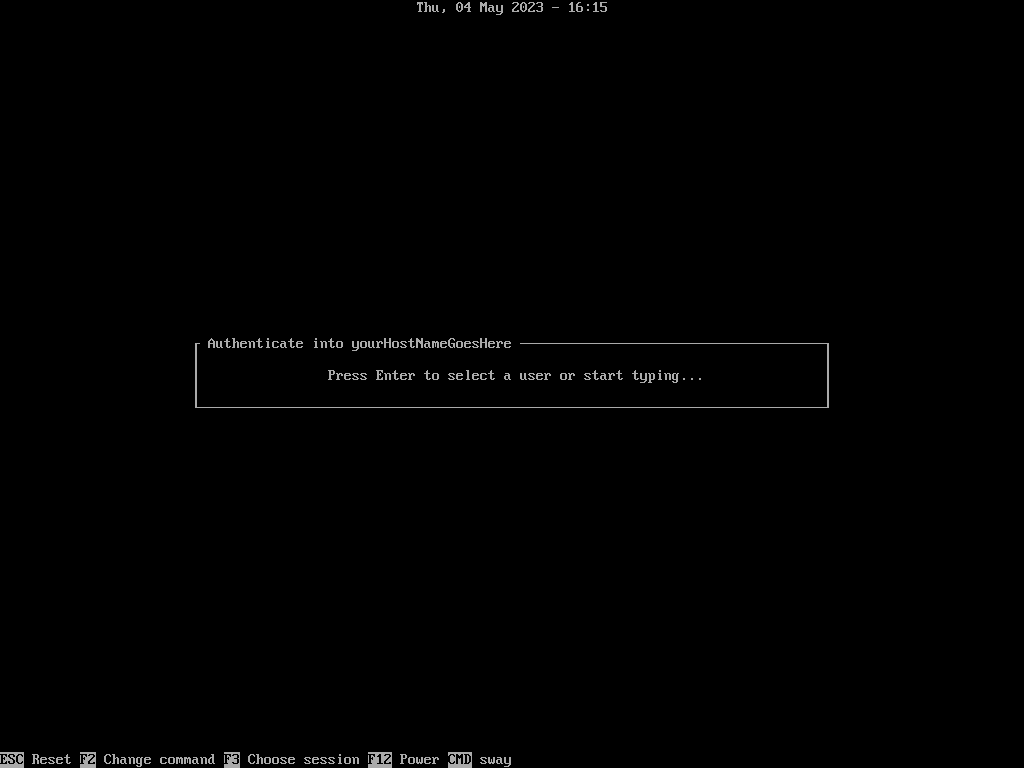
Adding a Nice Login Screen
For a login screen (or "Display Manager", as you may have learned earlier), we would use fancy greetd and tuigreet applications.
As per Arch Wiki, greetd is
a minimal, agnostic and flexible login manager daemon which does not make assumptions about what the user wants to launch, should it be console-based or graphical. Any script or program which can be started from the console may be launched by greetd, which makes it particularly suitable for Wayland compositors. It can also launch a greeter to start user sessions, like any other display manager.
tuigreet is a TUI (terminal user interface) greeter for greetd written in Rust. Both greetd and tuigreet are already available in nixpkgs. greetd is also exposed as a NixOS option.
To add those to our system, let's create a new file /etc/nixos/greetd.nix with the following content:
{
  pkgs,
  ...
}:
{
  services.greetd = {
    enable = true;
    settings = {
     default_session.command = ''
      ${pkgs.greetd.tuigreet}/bin/tuigreet \
        --time \
        --asterisks \
        --user-menu \
        --cmd sway
    '';
    };
  };

  environment.etc."greetd/environments".text = ''
    sway
  '';
}
What do all these lines mean?
First, the services.greetd is an option exposed by NixOS. You enable greetd and then set the settings. default_sesion.command is a string containing a shell script that tells greetd which exactly package to use for login screen and how to run it. In our case that is tuigreet with several options specified:
--timeto display the current date and time on the login screen.--asterisksto enable visual feedback on how many characters you have entered already. Disable that one if you don't like it.--user-menuto show graphical selection of users to log in with from a menu.--cmd swayto run Sway after a successful login.
environment.etc."greetd/environments".text = '' sway ''; makes sway available for selection as the graphical environment to log in into. Even though we have made only one option available, in the future, you may want to add more and switch between them, e.g. between a lightweight sway Compositor and a full-fledged hyperland Desktop Environment (also a "Compositor").
We also have to "embed" this file into our configuration. For that, we'll import it as a NixOS module within our /etc/nixos/flake.nix:
  modules = [
    ./configuration.nix
    ./greetd.nix
    home-manager.nixosModules.home-manager {
As you can see, the flake already expects something called "modules", our /etc/nixos/configuration.nix is also a module. But what is a module? You may stumble upon many vague definitions in other Nix docs and blog posts, but that's actually a quite simple concept - the "module" is just a term that is used to denote a file that makes a part of your system-wide configuration (the one, which you create and apply with nixos-rebuild switch.) You may have nix files for development, or other nix files as some scripts - these are not modules. Modules are part of a single file tree which is being evaluated at build time. By the way, there's also a module inside /etc/nixos/configuration.nix - the top-most import of ./hardware-configuration.nix.
Now, nixos-rebuild switch --flake .#yourHostNameGoesHere, reboot.
Getting More Stuff for Sway
So far, so good! We now have a proper sway managed by Home Manager with a greetd-tuigreet pair as a Display Manager (login screen).
Sway initially comes with a small selection of default utility applications, which are also tweakable via exposed configuration options:
- waybar - a highly customizable Wayland bar for Sway and Wlroots based compositors. This is the thin line you would see on the bottom of the screen in default Sway configuration with information like utilized storage, memory, current network IP address, and such.
- i3status, which is the machinery that powers the waybar and actually retrieves all that info for it to show
- foot - a fast, lightweight and minimalistic terminal emulator tailored specifically for Wayland
- dmenu - a "dynamic menu", which creates a "menu" - in this case, a line on the top of your screen with some output that is selectable via arrow keys. It is most often used as part of
dmenu_launcher, which is the application launcher you get when you pressMod4+din our current sway configuration. You may also want to try out pastingecho -e "first\nsecond\nthird" | dmenuin your terminal to get the idea of whatdmenudoes.
These applications are more than enough for a comfortable workstation! But let's add just a little bit more of useful stuff.
Open /etc/nixos/flake.nix and add mako, wl-clipboard, and shotman to the home.packages:
home.packages = with pkgs; [
  thunderbird
  keepassxc
  mako
  wl-clipboard
  shotman
];
mako is a highly customizable notifications manager. When the PC wants to tell your battery is running low, or when you receive a new email on thunderbird - Mako would pop up a message on the top-right of the screen.
wl-clipboard is a utility which enables the clipboard for wayland to work accross all applications. You can also use it inside the terminal, for example, to pipe some output to the clipboard.
shotman is a screenshot utility with a minimalistic UI. Actually, shotman requires some aditional tweaking to the Sway configuration:
wayland.windowManager.sway = {
  enable = true;
  config = rec {
    modifier = "Mod4"; # Super key
    output = {
      "Virtual-1" = {
        mode = "1920x1080@60Hz";
      };
    };
  };
  extraConfig = ''
    bindsym Print               exec shotman -c output
    bindsym Print+Shift         exec shotman -c region
    bindsym Print+Shift+Control exec shotman -c window
  '';
};
extraConfig exposes ther required keybindings for shotman. This way, you would now have screenshotting enabled when pressing the PrintScreen key. Also try PrintScreen with Shift to select an area to screenshot, or with both Shift and Control to select an open window. The resulting screenshot should pop up immediately on the screen in a floating window, and you'll have the freedom to copy it to the clipboard via the usual Ctrl+c. Screenshots are also automatically saved to the ~/screenshots folder under your home directory. To exit the Shotman pop-up, press Esc or q.
Finishing Touches
Let's put some finishing touches - some nice wallpaper, change our default terminal emulator application, and set up the system fonts.
To change the wallpaper, sway already comes with bg utility. You would add output "*" bg /path/to/image fill to the Sway's extraConfig exposed by Home-manager, just like with the additional keybinds for shotman.
The question however is - how to add the wallpaper as a system module, or, simply saying, as an immutable part of our system? That is quite simple actually - add the following line to your /etc/nixos/configuration.nix:
  environment.etc."foggy_forest.jpg".source = ./foggy_forest.jpg;
  networking = {
    networkmanager.enable = true;
    hostName = "yourHostNameGoesHere"; # edit this to your liking
  };
where "foggy_forest.jpg" is a wallpaper of your liking. I am using this one I've found on Reddit.
Put the wallpaper into /etc/nixos/foggy_forest.jpg. This way, it is visible to the configuration.nix under the expected path - so, within the same directory as noted by ./. The wallpaper would then be saved to the nix store (after a rebuild) as an immutable piece of our system, and, what is more important, it will be places to the /etc directory, so you can later refer to this path at extraConfig:
  extraConfig = ''
    bindsym Print               exec shotman -c output
    bindsym Print+Shift         exec shotman -c region
    bindsym Print+Shift+Control exec shotman -c window

    output "*" bg /etc/foggy_forest.jpg fill
  '';
Now, let's modify the terminal application to be used:
  config = rec {
    modifier = "Mod4"; # Super key
    terminal = "alacritty";
    output = {
      "Virtual-1" = {
        mode = "1920x1080@60Hz";
      };
    };
  };
There's nothing wrong with the default foot terminal application, but for the sake of exploring the possible options, we changed it to alacritty.
Let's also add some fonts, including the monospace ones, otherwise we would see some unappealing picture in the terminal (and elsewhere):
  fonts.fonts = with pkgs; [
    (nerdfonts.override { fonts = [ "DroidSansMono" ]; })
    dejavu_fonts # mind the underscore! most of the packages are named with a hypen, not this one however
    noto-fonts
    noto-fonts-cjk
    noto-fonts-emoji
  ];
nixos-rebuild switch --flake .#yourHostNameGoesHere, don't even have to reboot.
And We're Done!
You now have a flaked NixOS system with a nice and minimalistic Wayland configuration managed by Home Manager.
This article's full code alongside the rest of configuration is available on GitHub.


You inspire me to keep writing. Every reader counts.